Configure an Application in Microsoft Entra
To get started with this plugin, you will first need to configure an application in Microsoft Entra admin center. This will allow you to configure who and how people can connect to your site.
Go to Microsoft Entra
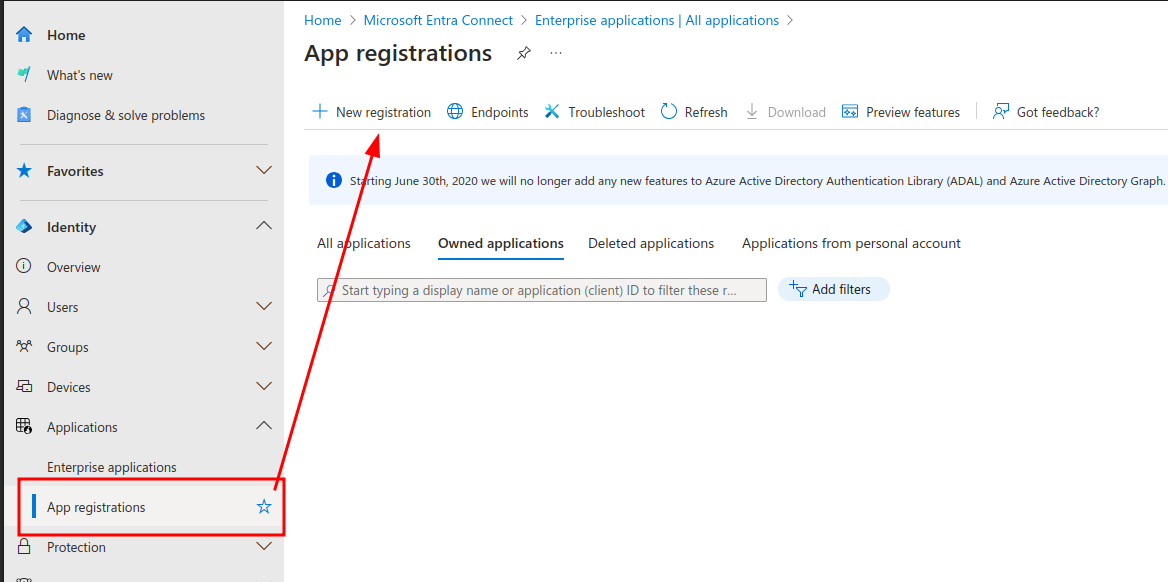
Click to expand "Identity" in the sidebar
Click to expand "Applications"
Click on "App registrations" (You can star this to make it show under "Favorites")
Click on "+ New Registration" (or select an existing app if you are coming back)
Register an application
In the next window you will be asked to register your application.
Select a name for your application, e.g. "MODX Entra Login for Example.com"
Select the "Supported account types" based on your needs
Single tenant will only allow users within your Entra directory
Multitenant will allow from any Entra directory
Personal will allow personal Microsoft accounts e.g. (Outlook, Xbox)
Multitenant + Personal will allow any Microsoft account
Set the Redirect URI
Set the platform to "Web"
Set the URL to
{{ url }}/{{ assets path }}/components/entralogin/callback.php, e.g.https://example.com/assets/components/entralogin/callback.phpIf you are using MODX Revolution 2.x use
callback.v2.phpinstead
Register additional Redirect URI's (optional)
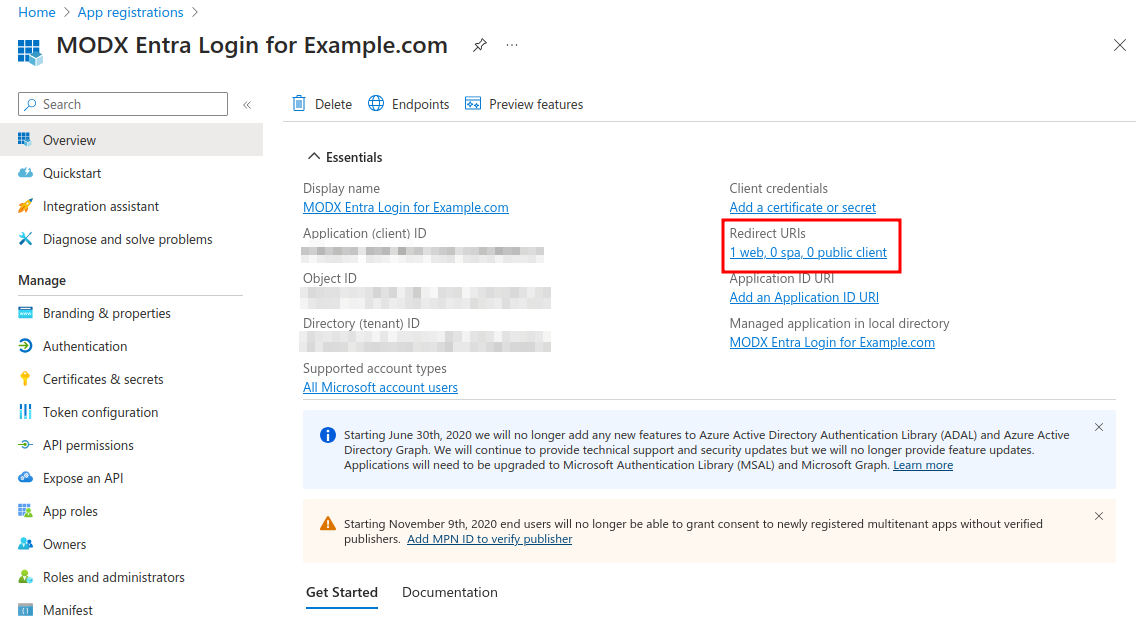
If you need to set this application up for multiple sites, or a site with multiple domains, you will need to register a Redirect URI for each domain. This can be done by clicking in the "Redirect URIs" of the app registration page.
Once in here, simply click "Add URI" below your existing Redirect URI(s)
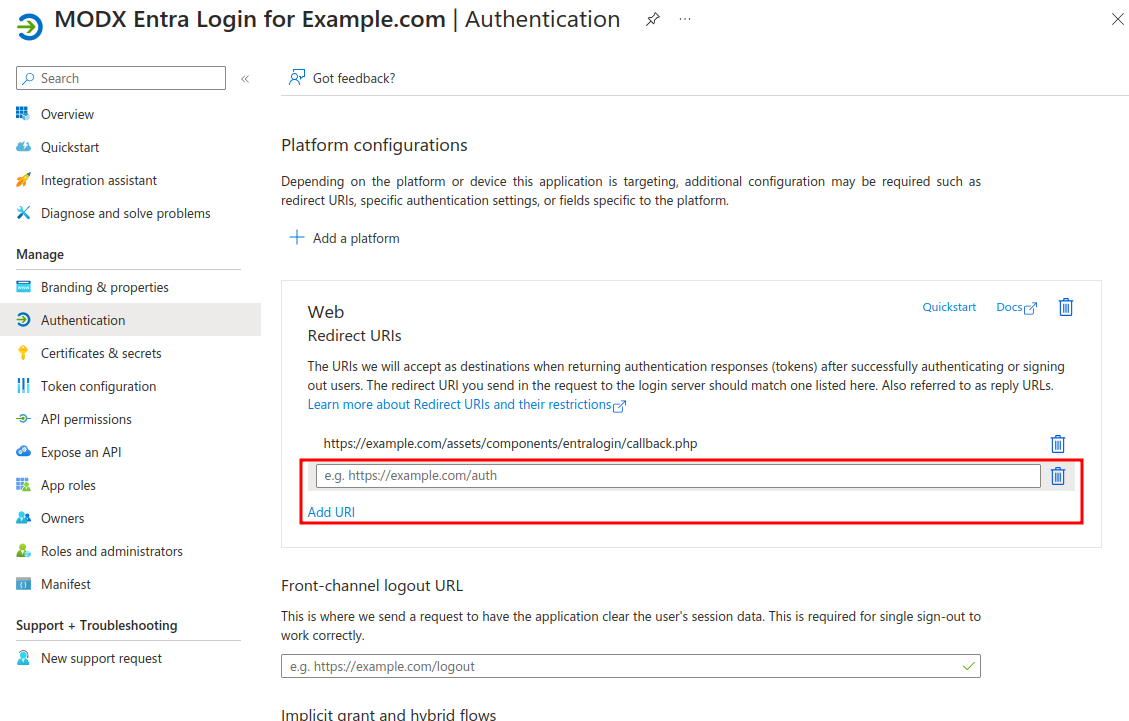
When all URI's are added, select "Save" at the bottom.
Create a Client Secret
The overview window will show you your Application (client) ID, which you will be used for the MODX system setting entralogin.client_id. You will also need to create a corresponding Client Secret for this app registration. To do this click on "Certificates & Secrets"
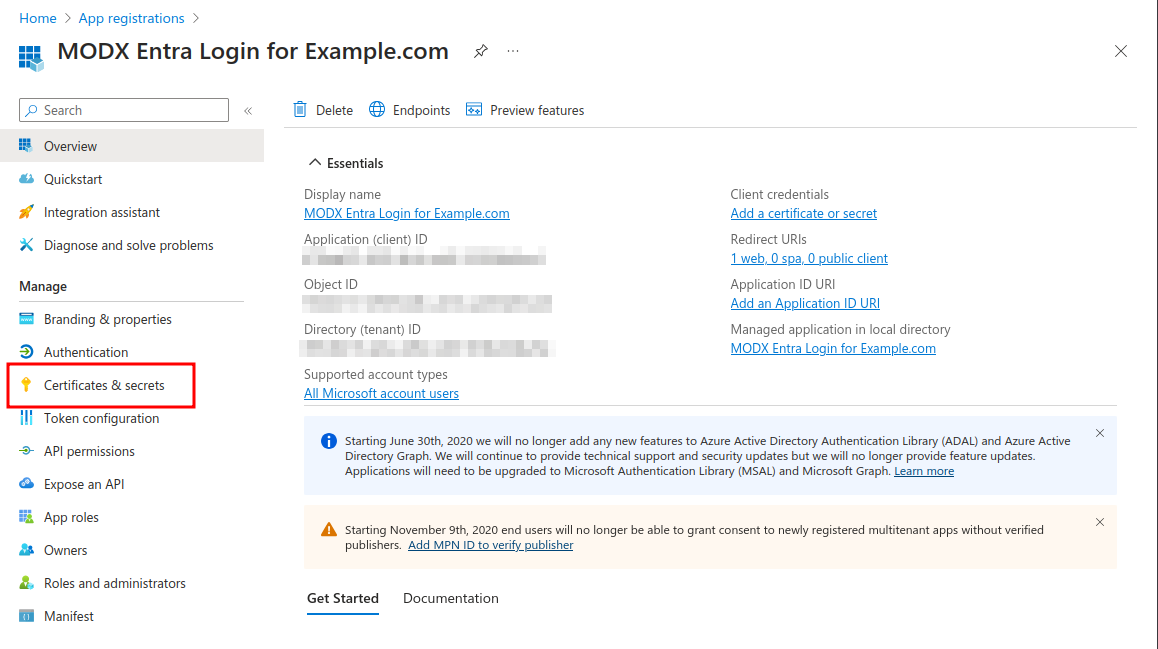
Once in the "Certificates & Secrets" section:
Make sure you are on the "Client secrets" tab
Click "+ New client secret"
Add a description for where this secret will be used
Set an expiration date.
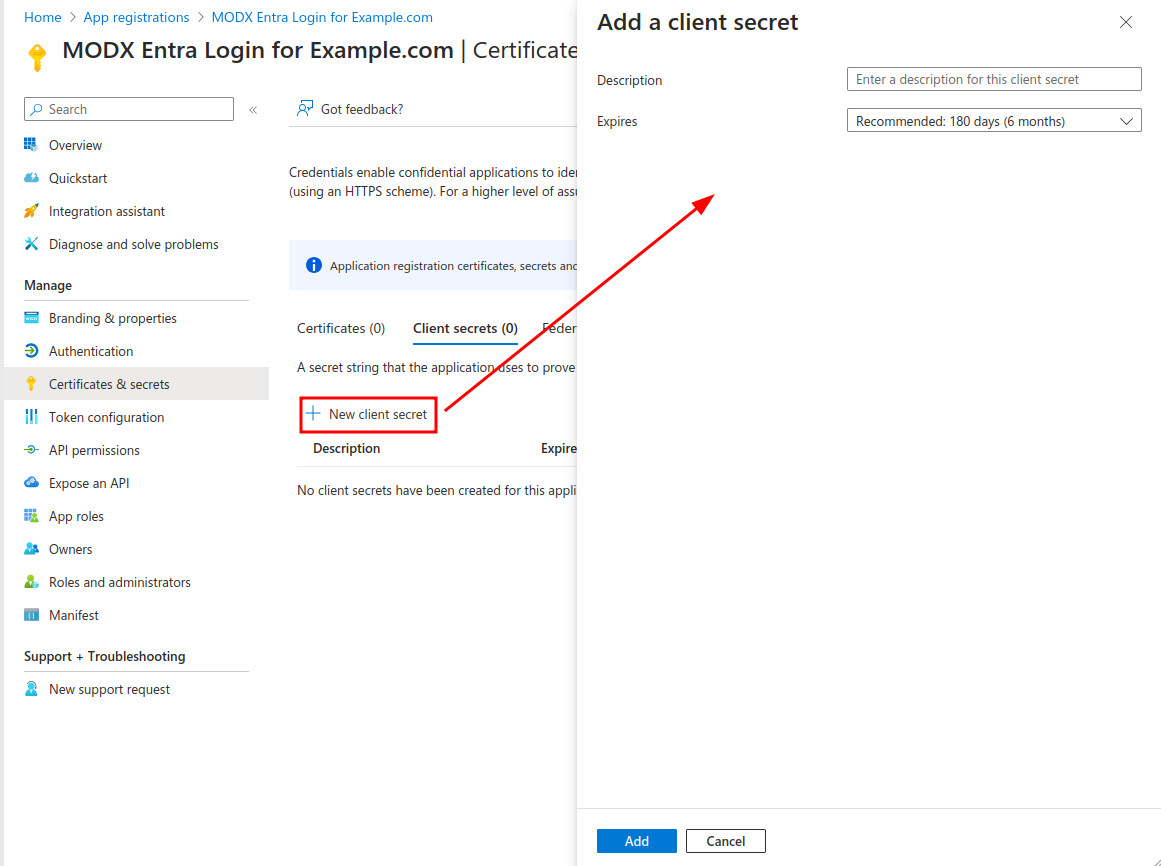
Once generated, click the copy button next to the value

Make sure to save this value for later, as it will be used for the MODX system setting entralogin.client_secret
Add API Permissions
The final step is to set up the permissions allowed by the application. To do this click on "API Permissions"
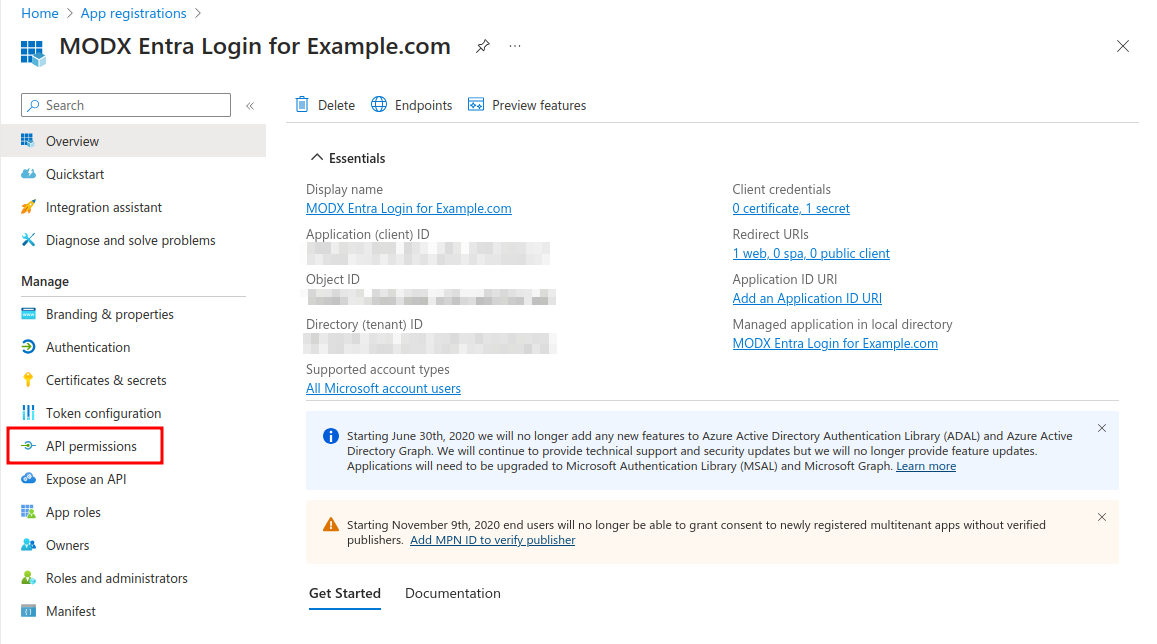
Once in the "API Permissions" section:
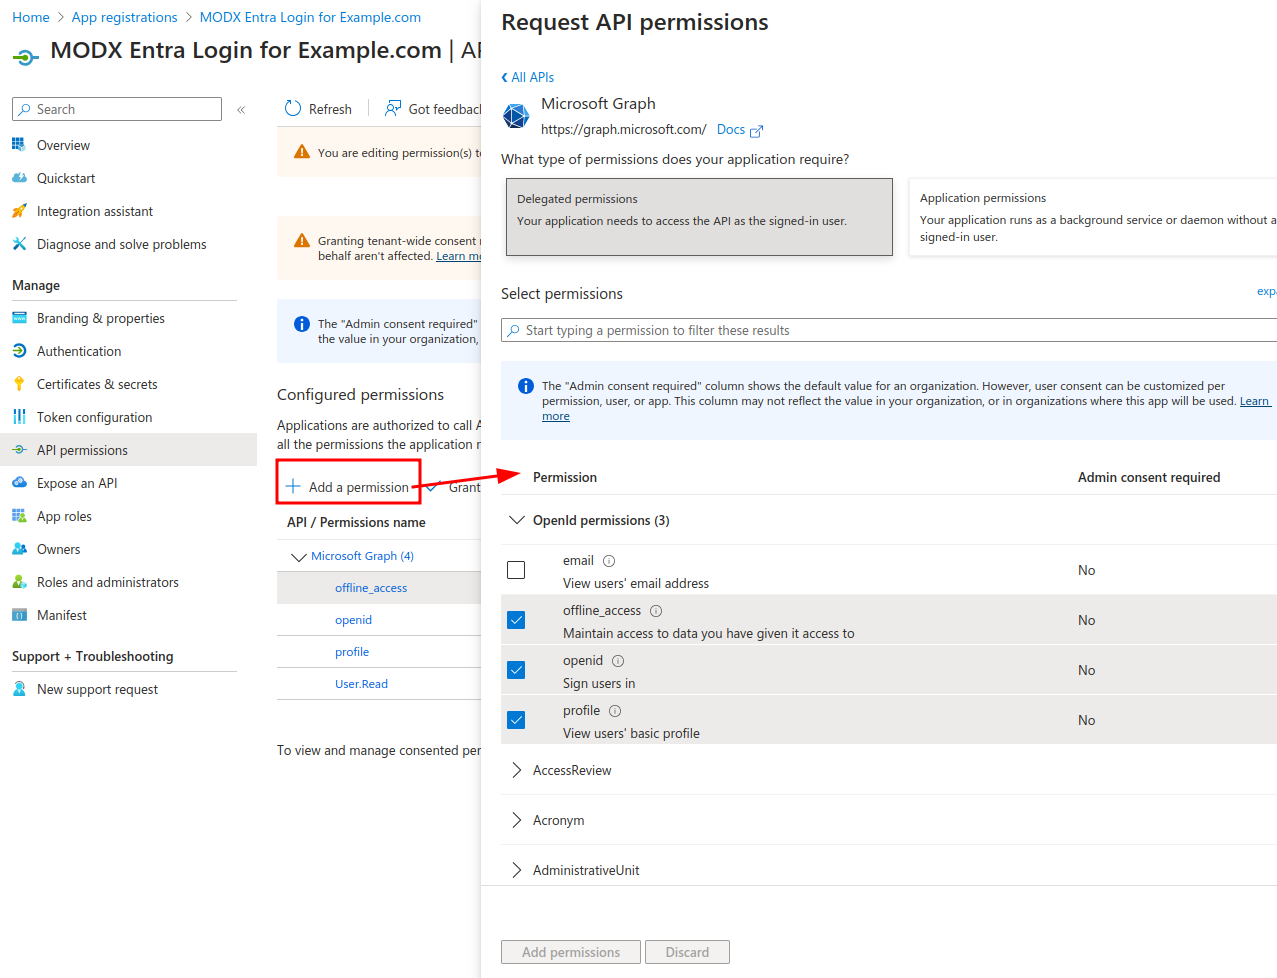
Click "+ Add a permission"
Select "Microsoft Graph"
Select "Delegated permissions"
Use the search box or scroll to enable the following permissions if they aren't already selected
offline_access
openid
profile
User.Read
Once you have verified all of these are selected, click "Add permissions"
Changing Supported Account Types (optional)
If you realize later that you selected the wrong supported account types you can change it by editing the "Manifest". This can be done by clicking in the "Manifest" of the app registration page.
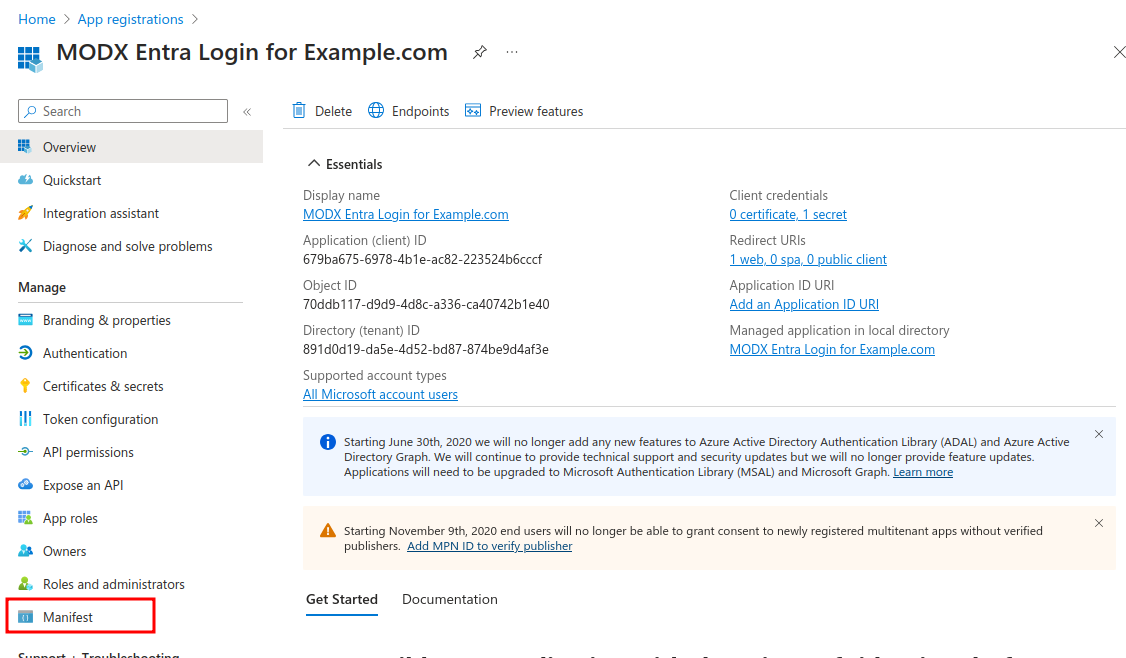
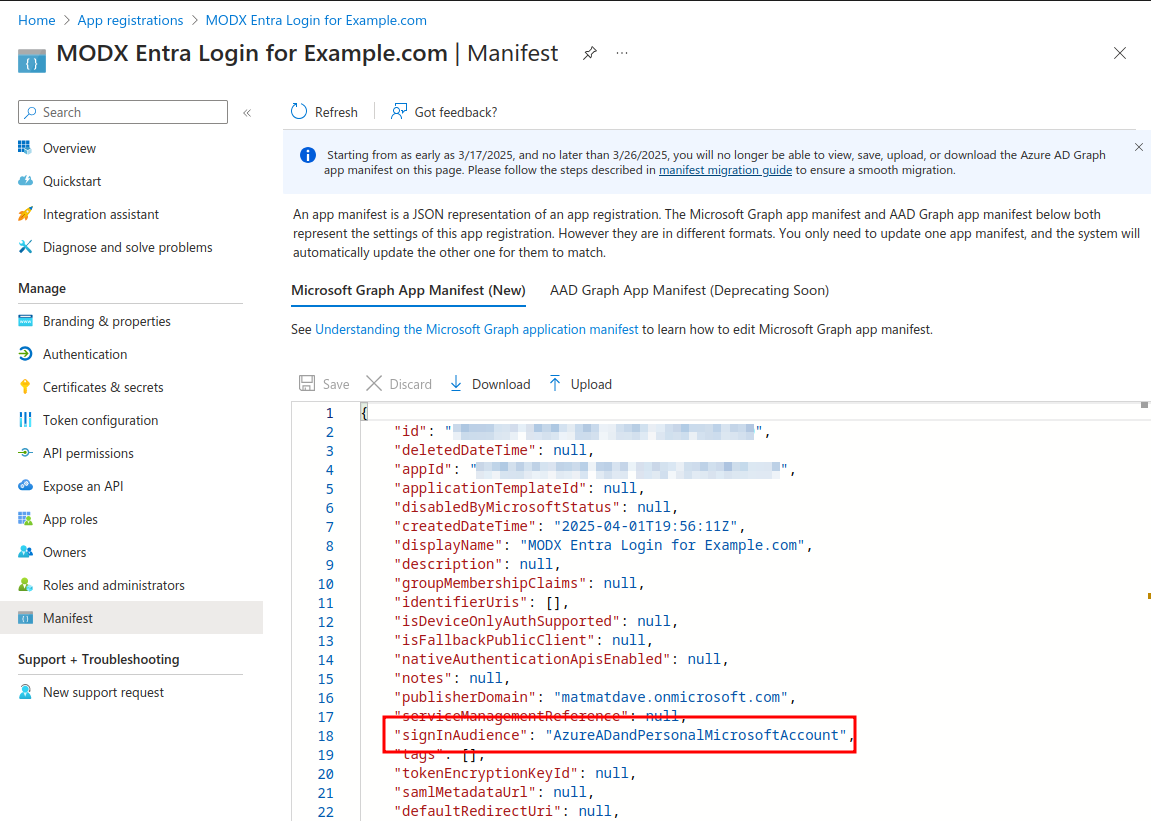
The manifest is a JSON file which describes your application. To edit this file:
Look for the line that says "signInAudience"
Set the value of that line to one of the following:
"AzureADMyOrg"- Single tenant"AzureADMultipleOrgs"- Multitenant"PersonalMicrosoftAccount"- Personal Accounts"AzureADandPersonalMicrosoftAccount"- Multitenant + Personal Accounts
Save the manifest
You can learn more here Supported Account Types
Using OIDC instead of Standard OAuth (optional)
If you prefer to use OIDC instead of the standard OAuth flow, you can do that by:
Adjust system settings, changing
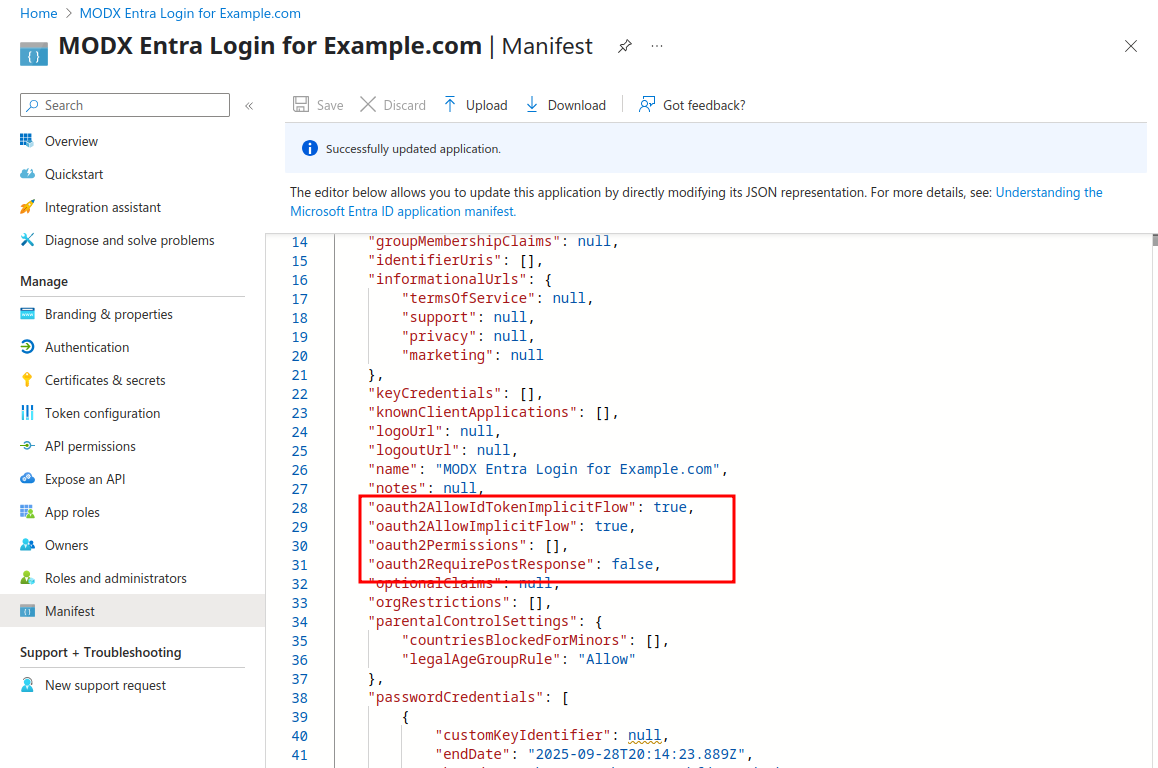
entralogin.methodto "oidc" instead of "oath"Adjust the manifest JSON file (described above) by adding the following lines:
It may require you to refresh the page and update the values again after first adding.
